10 Icebox Cakes That Keep It Cool
fromcookscrafter.comcookscrafter.com/10-icebox-cakes-that-keep-it-cool
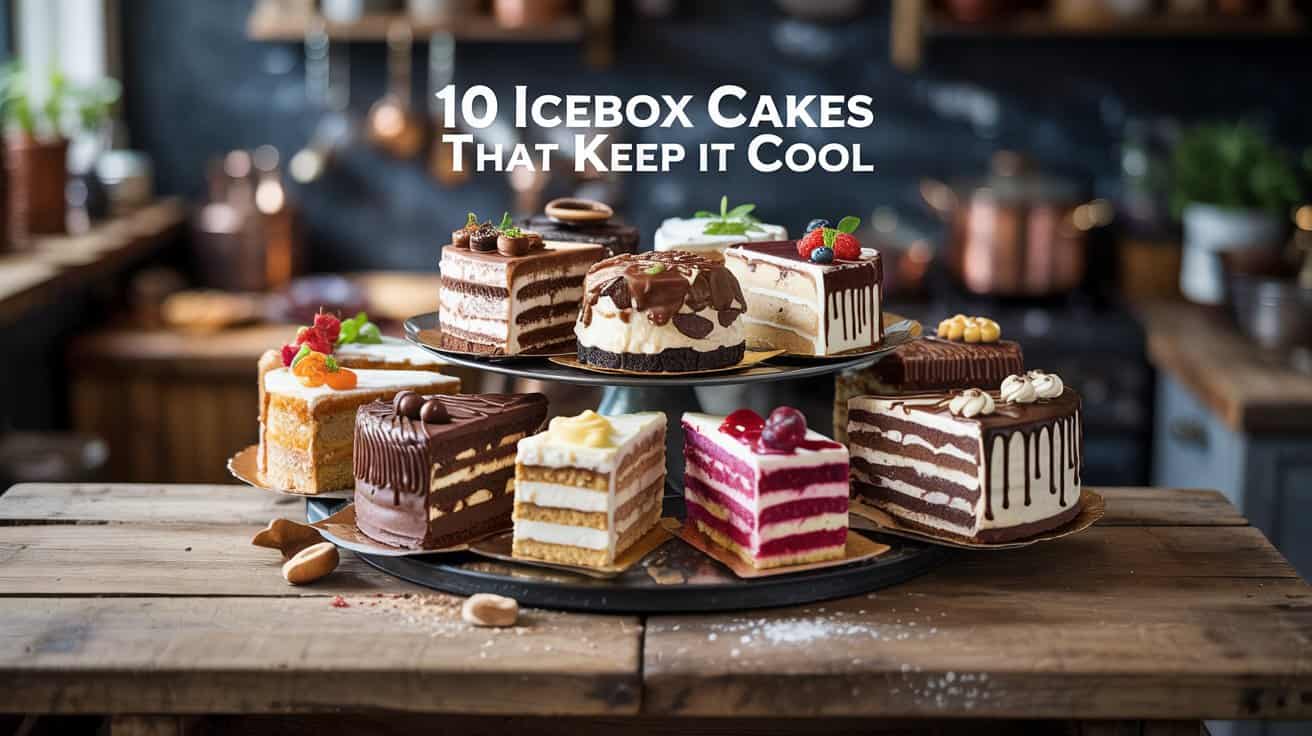
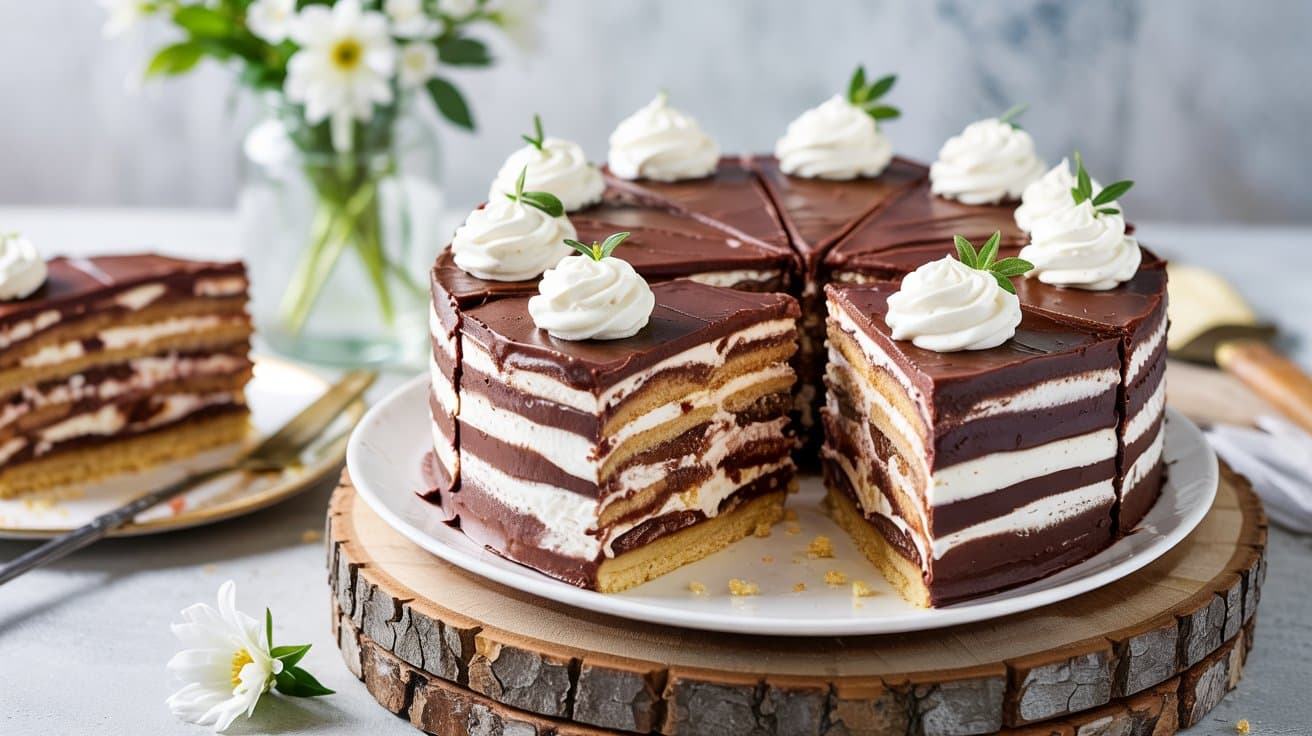
Icebox cakes layer chocolate wafers, whipped cream, and berries; swap heavy cream with coconut cream for a dairy-free version that stays cool and creamy.
Ingredients
Instructions
In a large mixing bowl, beat the chilled heavy whipping cream with granulated sugar and vanilla extract until stiff peaks form. The cream should be light and fluffy but hold its shape well.
Quickly spread a thin layer of whipped cream on the bottom of a serving dish or baking pan to prevent wafers from slipping.
Arrange a single layer of chocolate wafers over the whipped cream, slightly overlapping to cover the surface.
Spread an even layer of whipped cream over the wafers, smoothing gently to cover them completely.
Repeat layers of wafers and whipped cream, ending with a final layer of whipped cream on top.
Cover the dish with plastic wrap and refrigerate for at least 4 hours, preferably overnight. This allows the wafers to soften and absorb moisture from the cream, creating a tender, cake-like texture.
Serve chilled by cutting into squares. Keep leftovers covered in the fridge for up to 3 days.
Convenience - Requires no baking and can be made ahead, saving time on event days.
Flavor balance - Combines creamy mascarpone with the natural sweetness and tartness of berries.
Texture - Soft, cookie layers contrast nicely with smooth cream and juicy berries.
Appeal - Bright, colorful layers create an inviting look that suits casual or formal settings.
Serving ease - Individual portions or whole cake options reduce mess and simplify plating.
Mascarpone cheese - Substitute with cream cheese blended with a little heavy cream for a similar creamy texture.
Fresh berries - Use frozen berries thawed gently if fresh ones are out of season or hard to find.
Cookies - Swap traditional wafer cookies with graham crackers or gluten-free biscuits to suit dietary restrictions.
Sweetener - Replace powdered sugar with honey or maple syrup in the cream mixture for a natural sweetness.
Dairy-free option - Use coconut cream or a dairy-free cream cheese alternative to create a non-dairy version.
8 ounces mascarpone cheese - Soft Italian cream cheese that forms the base of the filling.
1 cup heavy cream - Whipped to add lightness and volume to the mascarpone.
⅓ cup powdered sugar - Provides sweetness to the cream mixture.
1 teaspoon vanilla extract - Adds warm flavor depth to the filling.
3 cups mixed fresh berries - Such as strawberries, blueberries, raspberries, and blackberries, rinsed and patted dry.
20 to 24 thin wafer cookies - For layering and softening in the cream.
Fresh mint leaves (optional) - For garnish and added freshness.
In a large bowl, beat the mascarpone cheese with powdered sugar and vanilla extract until smooth. In a separate bowl, whip the heavy cream until stiff peaks form. Gently fold the whipped cream into the mascarpone mixture until fully combined and light.
Spread a thin layer of the mascarpone cream on the bottom of a 9x9 inch dish or a similar-sized pan. Arrange a single layer of wafer cookies over the cream, breaking cookies as needed to fit.
Spoon a generous layer of mascarpone cream over the cookies, smoothing it down with a spatula. Sprinkle a layer of mixed fresh berries evenly on top.
Repeat the layering process-cookies, cream, then berries-until all ingredients are used, finishing with a layer of cream and a few berries on top for decoration.
Cover the dish tightly with plastic wrap and refrigerate for at least 4 hours or overnight. This allows the cookies to soften and flavors to meld.
Just before serving, garnish with fresh mint leaves if desired. Cut into squares or scoop portions with a spatula and enjoy chilled.
Convenience - Requires no baking and can be prepared ahead of time, saving time on busy days.
Flavor balance - Combines strong coffee with chocolate and creamy layers for a balanced taste.
Texture - Features soft, soaked cookies layered with smooth, fluffy cream.
Appeal - Suits coffee lovers looking for a dessert with rich yet subtle caffeine notes.
Serving ease - Portions easily into slices, perfect for sharing with family or guests.
Coffee substitute - Replace espresso with strong brewed coffee or instant coffee mixed with hot water if an espresso machine is unavailable.
Chocolate options - Use dark cocoa powder instead of melted chocolate for a lighter texture and less sweetness.
Cream variation - Swap heavy cream with coconut cream or a dairy-free whipping cream for a non-dairy version.
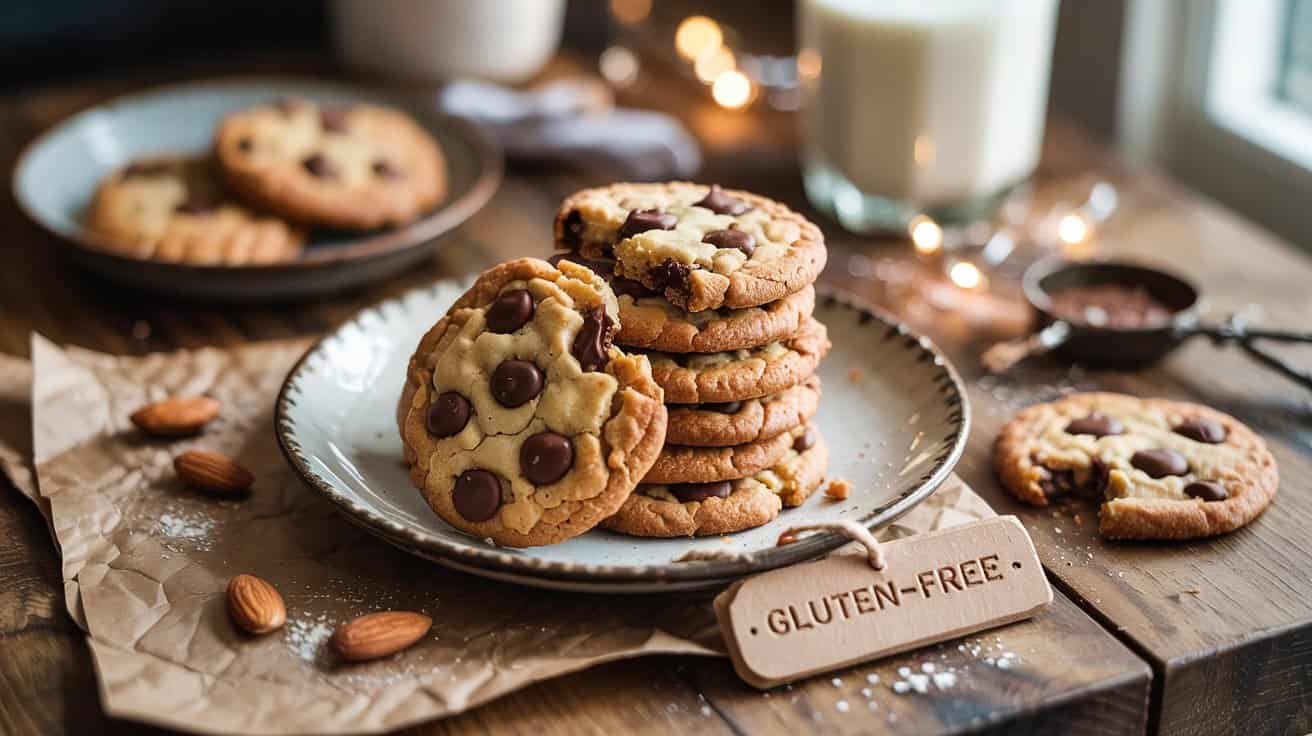
Cookies - Opt for gluten-free wafers or ladyfingers to make the dessert gluten-free.
Sweetener adjustments - Use maple syrup or agave instead of sugar for a different kind of sweetness.
1 cup brewed espresso cooled to room temperature
¼ cup granulated sugar for espresso infusion
1 ½ cups heavy cream chilled
⅓ cup powdered sugar for whipping cream
4 ounces bittersweet chocolate melted and slightly cooled
24 chocolate wafer cookies or ladyfingers
1 teaspoon vanilla extract
2 tablespoons unsweetened cocoa powder for dusting
Stir the granulated sugar into the brewed espresso until dissolved. Set aside to cool completely.
In a large bowl, whip the chilled heavy cream with powdered sugar and vanilla extract until soft peaks form. Gently fold in the melted chocolate until combined and smooth.
Quickly dip each chocolate wafer cookie into the cooled espresso, making sure not to soak them too long, then layer cookies evenly in the bottom of a rectangular dish.
Spread a generous layer of the chocolate whipped cream over the cookie layer. Repeat dipping, layering, and spreading until all ingredients are used, finishing with a layer of cream on top.
Dust the top layer with unsweetened cocoa powder for a finishing touch. Cover and refrigerate the cake for at least 6 hours, preferably overnight, to allow flavors to meld and cookies to soften.
Slice and serve chilled, enjoying the blend of espresso and chocolate in every bite.
Convenience - No baking required, easy to assemble, and can be made ahead.
Flavor balance - Bright lemon curd and tart raspberries contrast with the creamy, rich filling.
Texture - Smooth cream cheese layers combine with softened cookies for a tender bite.
Appeal - Looks elegant with bright layers, ideal for gatherings.
Serving ease - Ready to slice and serve, reducing mess and effort.
Lemon curd - Use store-bought curd or substitute with passion fruit curd for a tropical twist.
Cream cheese - Replace with a dairy-free cream cheese alternative to make it vegan.
Raspberries - Swap for blueberries or strawberries depending on the season or preference.
Cookies/crackers - Use gluten-free graham crackers or digestives for gluten sensitivity.
Sweetener - Substitute sugar in the lemon curd with honey or maple syrup if preferred.
1 cup lemon curd - Rich and tangy, provides the bright lemon flavor.
2 cups fresh raspberries - Adds tartness and bright color.
8 ounces cream cheese, softened - Creates a smooth and creamy layer.
1 cup heavy cream - Whipped into soft peaks to lighten the filling.
3 tablespoons powdered sugar - Sweetens the cream cheese mixture gently.
24 graham crackers or digestive biscuits - Forms the cake layers, softening during chilling.
1 teaspoon pure vanilla extract - Enhances the flavor of the cream cheese filling.
In a large bowl, beat the softened cream cheese with powdered sugar and vanilla extract until smooth and slightly fluffy.
In a separate bowl, whip the heavy cream until soft peaks form. Gently fold the whipped cream into the cream cheese mixture until fully combined and light.
Spread a thin layer of lemon curd on the bottom of a 9x9-inch dish. Arrange a single layer of graham crackers over the curd.
Spread about one-third of the cream cheese mixture evenly over the crackers. Sprinkle a layer of fresh raspberries on top.
Repeat layering twice more with lemon curd, crackers, cream cheese mixture, and raspberries, finishing with a layer of cream cheese mixture on top.
Cover the dish with plastic wrap and refrigerate for at least 4 hours or overnight to allow the layers to set and the crackers to soften.
Slice into squares and serve chilled for a refreshing dessert.
Convenience - Requires no baking and can be made ahead, letting flavors meld while chilling.
Flavor balance - Combines creamy coconut and bright pineapple with just a hint of sweetness.
Texture - Features soft, layered cookies softened by whipped cream contrasted with pineapple chunks.
Appeal - Offers a light, fruity dessert option that's easy to portion and serve.
Versatility - Works well for family treats, summer parties, or easy entertaining.
Coconut wafer cookies - Replace with graham crackers or vanilla wafers if coconut wafers aren't available.
Pineapple chunks - Use fresh mango or peach pieces for a different tropical twist.
Whipped cream - Opt for coconut whipped cream or a dairy-free alternative to keep it vegan-friendly.
Sweetener - Add a spoonful of maple syrup or honey into the whipped cream if you prefer extra natural sweetness.
Toppings - Garnish with toasted shredded coconut or chopped nuts for added texture and flavor.
Coconut wafer cookies - 2 to 3 sleeves, depending on your pan size.
Pineapple chunks - 2 cups, drained if canned or freshly cut.
Heavy cream - 2 cups, chilled and ready for whipping.
Powdered sugar - ¼ cup, to sweeten the whipped cream.
Vanilla extract - 1 teaspoon, to flavor the whipped cream.
Shredded coconut - ½ cup, unsweetened or sweetened, optional garnish.
Whip the heavy cream with powdered sugar and vanilla extract until soft peaks form. Set aside.
Spread a thin layer of whipped cream on the bottom of a rectangular or square dish.
Arrange a single layer of coconut wafer cookies over the whipped cream, fitting them snugly together.
Spread a layer of whipped cream over the cookies, then scatter pineapple chunks evenly on top.
Repeat layering with cookies, whipped cream, and pineapple until you use all ingredients or fill the dish.
Finish with a generous layer of whipped cream and garnish with shredded coconut if you like.
Cover the dish with plastic wrap and refrigerate for at least 6 hours or overnight to let the cookies soften and flavors combine.
Slice into squares and serve chilled, enjoying the creamy, fruity layers with each bite.
Convenience - Requires no baking and can be made ahead, saving time and effort.
Flavor balance - Combines creamy peanut butter with rich chocolate for a satisfying taste.
Texture - Layers of crisp wafers soften into a tender, mousse-like consistency.
Appeal - A crowd-pleaser that suits both casual and festive occasions.
Serving ease - Easy to slice and portion, making it great for sharing.
Peanut butter substitute - Use almond or cashew butter for a different nutty taste.
Chocolate wafers - Swap regular chocolate wafers for gluten-free or whole-grain options.
Sweetener - Replace sugar with maple syrup or honey for natural sweetness.
Dairy alternative - Use coconut cream or cashew cream instead of heavy cream for a dairy-free version.
Crunch addition - Add chopped nuts or pretzels between layers for extra texture.
1 cup creamy peanut butter - Provides rich, nutty flavor and smooth texture.
2 cups heavy cream - Whipped to create the fluffy peanut butter filling.
½ cup powdered sugar - Adds sweetness and stabilizes the cream.
1 teaspoon vanilla extract - Enhances the overall flavor.
30 to 40 chocolate wafer cookies - Used for layering, offering crispness and chocolate flavor.
Pinch of salt - Balances the sweetness and shows the peanut butter taste.
In a large bowl, whip the heavy cream with powdered sugar and vanilla extract until stiff peaks form.
Gently fold the peanut butter and a pinch of salt into the whipped cream, mixing until smooth and uniform.
Spread a thin layer of the peanut butter cream at the bottom of a rectangular or square dish.
Arrange a layer of chocolate wafers over the cream, fitting them snugly side by side.
Spread another layer of peanut butter cream over the wafers, then add more wafers on top. Repeat layers until ingredients are used, ending with a cream layer.
Cover the dish with plastic wrap and refrigerate for at least 4 hours or overnight to let the wafers soften and flavors meld together.
Slice and serve chilled for a rich, creamy dessert with a satisfying chocolate-peanut butter combination.
Convenience - The no-bake format and use of store-bought gluten-free biscotti makes assembly quick and stress-free.
Texture Contrast - Crisp biscotti layers soften slightly while retaining enough bite against the creamy filling.
Flavor Balance - Nutty almond biscotti combined with a subtly sweet cream creates a balanced flavor.
Diet-Friendly - Gluten-free ingredients ensure this dessert suits varied dietary requirements.
Make-Ahead Friendly - The cake can be assembled in advance, allowing flavors to meld overnight for enhanced taste.
Almond Biscotti - Substitute with gluten-free hazelnut or pistachio biscotti for a different nutty note.
Cream Filling - Use coconut cream or another non-dairy whipped topping to make the filling dairy-free.
Sweetener - Replace granulated sugar with honey or maple syrup for a natural sweetener variation.
Flavor Add-Ins - Add a teaspoon of almond extract or vanilla bean paste to the cream for deeper flavor.
Nut Inclusion - Fold in toasted chopped almonds or other nuts into the cream for extra crunch and richness.
10 gluten-free almond biscotti - Whole, for layering in the cake.
2 cups heavy cream - Chilled, for whipping the filling.
½ cup powdered sugar - To sweeten the cream filling.
1 teaspoon vanilla extract - Adds subtle flavor to the cream.
¼ cup sliced almonds - Lightly toasted, to garnish and add texture.
Using a stand or hand mixer, whip the heavy cream with powdered sugar and vanilla extract until stiff peaks form. Set the cream aside.
Arrange a single layer of gluten-free almond biscotti at the bottom of a loaf pan or a square dish, breaking pieces if needed to fit.
Spread one-third of the whipped cream evenly over the biscotti layer.
Repeat the biscotti and cream layers two more times, finishing with a cream layer on top.
Sprinkle the toasted sliced almonds evenly over the top layer of cream.
Cover the cake tightly with plastic wrap and refrigerate for at least 6 hours or overnight to allow the biscotti to soften slightly and the flavors to meld.
Convenience - No baking required, just assembly and chilling.
Flavor balance - Sweet strawberries, creamy whipped topping, and soft cookies work well together.
Texture - The cookies soften overnight, creating a tender, melt-in-your-mouth experience.
Appeal - Bright and colorful, perfect for gatherings or a casual dessert.
Serving ease - Pre-portioned and easy to slice, reducing mess and fuss.
Cookies - Use gluten-free or dairy-free cookies to suit dietary restrictions.
Whipped cream - Substitute with coconut whipped cream for a dairy-free version.
Strawberries - Try raspberries or mixed berries for a different flavor twist.
Sweetener - Add a touch of honey or maple syrup instead of granulated sugar for natural sweetness.
Additional flavors - Stir a few drops of vanilla or almond extract into the whipped cream for extra aroma.
1 pound fresh strawberries - hulled and sliced
3 tablespoons granulated sugar - to macerate the strawberries
1 ½ cups heavy whipping cream - chilled
2 tablespoons powdered sugar - to sweeten the whipped cream
1 teaspoon vanilla extract - for the whipped cream
15 to 20 soft shortbread or vanilla wafer cookies - store-bought or homemade
In a medium bowl, combine the sliced strawberries with granulated sugar. Stir gently and let them sit at room temperature for about 15 minutes to release their juices.
In a large mixing bowl, whip the chilled heavy cream using a hand mixer or stand mixer. Gradually add powdered sugar and vanilla extract, continuing to whip until soft peaks form.
Spread a thin layer of whipped cream on the bottom of a 9x9-inch square dish or similar container. Arrange a single layer of cookies on top, slightly overlapping as needed.
Spoon half of the macerated strawberries and their juices evenly over the cookie layer, then spread a layer of whipped cream over the strawberries.
Repeat the layers: cookies, remaining strawberries, and the rest of the whipped cream. Finish with a final layer of whipped cream on top.
Cover the dish with plastic wrap and refrigerate for at least 4 hours or overnight. This allows the cookies to soften and the flavors to meld.
Before serving, garnish with extra strawberries if desired. Slice into squares and serve chilled.
Convenience - No baking required, and it comes together quickly with simple layering.
Flavor balance - Combines warm pumpkin spice with sweet vanilla and cream for a balanced taste.
Texture - The vanilla wafers soften perfectly between layers of creamy filling.
Appeal - Shows off seasonal flavors with a classic, inviting look.
Make-ahead friendly - Chills well overnight, which enhances flavors and softens layers.
Pumpkin puree - Use sweet potato puree instead for a milder, earthier flavor.
Whipped topping - Swap in coconut whipped cream for a dairy-free version that still whips up light and fluffy.
Vanilla wafers - Choose gluten-free cookies or gingersnaps for a spicier note and gluten-friendly option.
Spices - Add or substitute nutmeg or ginger for a slightly different pumpkin spice profile.
Sweetener - Use maple syrup or honey in the filling instead of sugar for a natural sweetness and added depth.
Vanilla wafers - 2 sleeves (about 60 wafers), for layering and crispness.
Pumpkin puree - 1 ½ cups canned or homemade, smooth and creamy.
Cream cheese - 8 ounces, softened to blend smoothly into the filling.
Powdered sugar - 1 cup, to sweeten and stabilize the filling.
Pumpkin pie spice - 2 teaspoons, blends cinnamon, nutmeg, ginger, and cloves for warm flavor.
Vanilla extract - 1 teaspoon, enhances the pumpkin filling's richness.
Heavy whipping cream - 2 cups, chilled for whipping into soft peaks.
Salt - ¼ teaspoon, balances sweetness and highlights flavors.
In a large bowl, beat the softened cream cheese and powdered sugar until smooth and creamy. Add the pumpkin puree, pumpkin pie spice, vanilla extract, and salt, mixing until well combined.
In a separate chilled bowl, whip the heavy cream to soft peaks. Gently fold the whipped cream into the pumpkin mixture to keep it light and airy.
Spread a thin layer of the pumpkin cream filling on the bottom of a 9x13-inch dish. Arrange a layer of vanilla wafers over the filling, covering the bottom completely.
Add another layer of the pumpkin cream, smoothing it over the wafers. Repeat layering wafers and pumpkin cream until all ingredients are used, finishing with a layer of pumpkin cream on top.
Cover the dish tightly with plastic wrap and refrigerate for at least 6 hours or overnight. This chilling time softens the wafers and allows flavors to meld.
Before serving, optionally garnish with a sprinkle of cinnamon or some whipped cream. Cut into squares and serve chilled.
Convenience - No baking needed, and simple layering prep makes it quick to assemble.
Flavor balance - Rich chocolate mixed with avocado's natural creaminess hits a smooth, satisfying note.
Texture - Alternating layers of silky cream and crunchy cookies add interest with every bite.
Appeal - Dairy-free and vegan, it suits various dietary preferences without sacrificing taste.
Make-ahead friendly - The cake sets in the fridge, allowing flavors to meld while making it an ideal prep-ahead dessert.
Avocado - Use ripe banana or silken tofu instead if you want a milder flavor or need an avocado alternative.
Vegan cookies - Swap with gluten-free or nut-based cookies for dietary preferences or added texture.
Cocoa powder - Choose raw cacao powder for a less processed, more intense chocolate flavor.
Sweetener - Replace maple syrup with agave or coconut nectar depending on your preferred sweetness or pantry staples.
Milk - Use almond, oat, or soy milk to adjust creaminess or flavor based on what you have available.
2 ripe avocados - peeled and pitted for a creamy base.
½ cup unsweetened cocoa powder - for rich chocolate flavor.
⅓ cup pure maple syrup - provides natural sweetness.
¼ cup plant-based milk - almond or oat milk works well to adjust consistency.
1 teaspoon vanilla extract - enhances chocolate notes.
¼ teaspoon salt - balances sweetness and intensifies flavor.
15 to 20 vegan chocolate or graham cookies - sturdy enough to layer without becoming soggy.
In a food processor or blender, combine the avocados, cocoa powder, maple syrup, plant-based milk, vanilla extract, and salt. Blend until the mixture is smooth and creamy without lumps.
Line a loaf pan or any small rectangular dish with parchment paper for easy removal later.
Spread a thin layer of the avocado chocolate cream on the bottom of the pan. Arrange a single layer of vegan cookies over the cream.
Repeat the layering process, alternating between the chocolate cream and cookies until all ingredients are used. Finish with a layer of chocolate cream on top.
Cover the dish tightly with plastic wrap and refrigerate for at least 4 hours or overnight. This allows the cookies to soften slightly and the flavors to meld together.
Use the parchment paper to lift the cake out of the pan. Slice into portions and serve chilled for a refreshing and indulgent treat.





:max_bytes(150000):strip_icc()/10813-best-chocolate-chip-cookies-mfs-146-4x3-b108aceffa6043a1ac81c3c5a9b034c8.jpg)